 6.s096
Installing Python on Mac OSX
Please Log In for full access to the web site.
Note that this link will take you to an external site (https://shimmer.mit.edu) to authenticate, and then you will be redirected back to this page.
Table of Contents
1) Install Python
Python is pre-installed on MacOS X, but it is often an older version. For this class, you will need to install Python 3.13.1. If you do not already have this version of Python installed, you can download the Python installer here:
2) Text Editor or IDE
You will also need a program for editing your Python source files. If you have prior programming experience, you may or may not already have a preferred text editor (or Integrated Development Environment) for working with Python code. If you already have something you are familiar with, feel free to use that!
Otherwise, we recommend using VsCode. The following sections will walk you through installing VsCode, creating a folder for this class, and disabling AI features.
2.1) Install VsCode
If you don't already have VsCode installed on your computer, follow the instructions on this webpage to install VsCode on Mac.
Once your installation is complete, you should be able to open VsCode.
2.2) Disable AI
Now let's disable the AI features in VsCode, which are not allowed to be used in this course. You can do so by following these instructions, which are also illustrated in the GIF below:
- Hover your mouse at the top of your screen, then click Code -> Settings... -> Settings.
- Search "Disable AI" in the Settings search bar.
- Check the box labeled "Chat: Disable AI Features".
- Check to make sure the GitHub Copilot logo is gone at the bottom of the screen.
2.3) Create a Folder for 6.s096
Let's create a folder for this course, so that you can access, edit, and run the code for the assignments all in one place. Go ahead and create an empty folder called something like "6.s096" in a place that is easy to access (like your Desktop or Documents folder).
Once that folder exists, open it in VsCode by clicking Open... and navigating to the right folder.

3) Run a Python Program
Now that we have installed Python and an IDE, let's double check to make sure everything is installed properly by running some Python code!
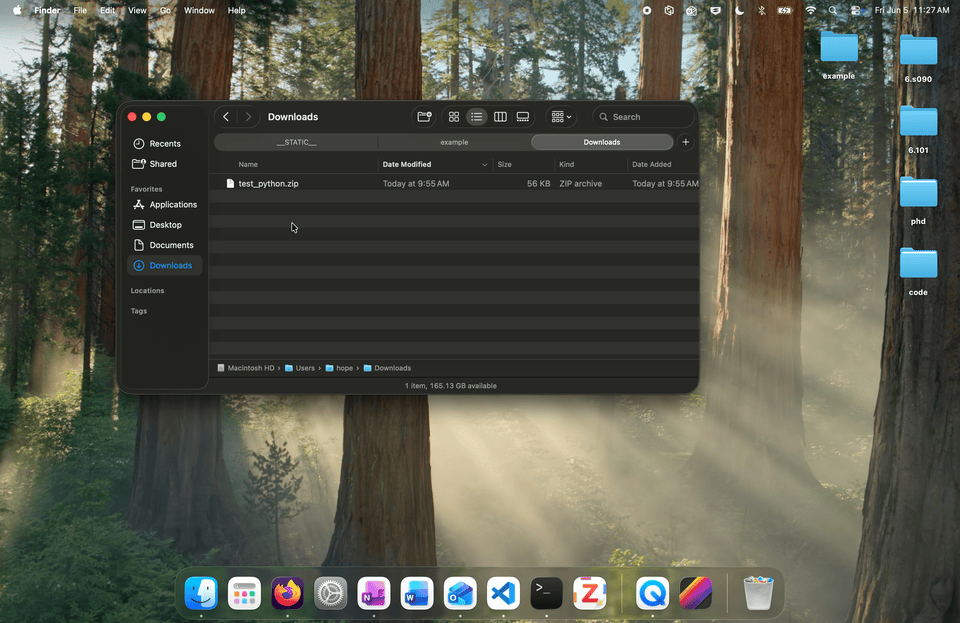
- First, download the following zip file: test_python.zip and extract the contents. Move the unzipped folder into your 6.s096 folder.
- Open the
hello_world.pyfile in your IDE (note the.pyextension means the file is a Python program). - Make sure the correct Python interpreter is selected (Python 3.13.1).
- Run the file by clicking the ▶️ run button.
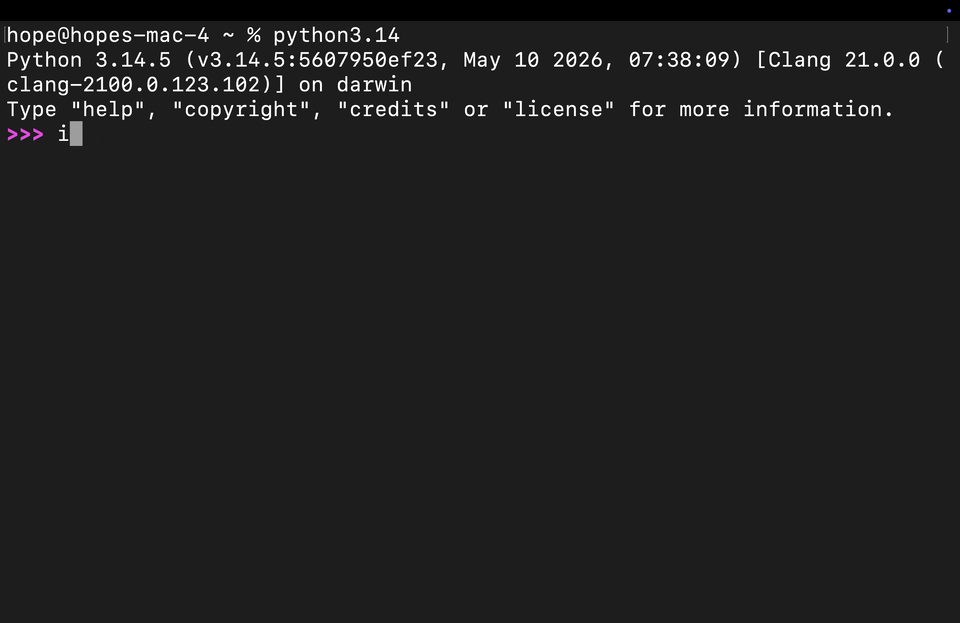
When you click the run button in VsCode, it should open a terminal window at the bottom of the screen and enter a command that tells Python to execute the Python file that you have open. Once the python file has been executed, you should see something like the following in your terminal window.
hope@hopes-mac-4 example % /usr/local/bin/python3 /Users/hope/Desktop/example/test_python/hello_world.py
Hello, world!
------------------------------------
Python version: 3.14.5 (v3.14.5:5607950ef23, May 10 2026, 07:38:09) [Clang 21.0.0 (clang-2100.0.123.102)]
Source file: /Users/hope/Desktop/example/test_python/hello_world.py
Source folder: /Users/hope/Desktop/example/test_python
Module name: __main__
hope@hopes-mac-4 example %
While the exact details in your output might look different, the
output should say Python version: 3.14.5.
4) Terminal / Command Line
Open the test_install.py file in your IDE and run the program. You will likely see an error
message that looks something like:
Traceback (most recent call last):
  File ".../test_python/test_install.py", line 19, in <module>
    import geopandas
ModuleNotFoundError: No module named 'geopandas'
In this case, the ModuleNotFoundError is likely due to the fact that we do not have this package installed.
When you installed Python, it came "out of the box" with the functionality in the Python Standard Library. Just like a phone has a few default apps and an app store lets you install additional apps as needed, Python has a few default packages that come with it. One of the main advantages of Python is the vast number of additional packages that you can install to expand its functionality, without having to write lots of code yourself. In the following sections we will install a number of Python packages using the Terminal. These packages are quite useful for data science and Machine Learning applications, and we will use some of them later in the course.
4.1) Open the Terminal
Two common ways of opening the terminal on Mac are:
- Opening the terminal app.
- Opening the terminal within VsCode (or IDE). Note that in VsCode you can hide the terminal by clicking the "X" in the top right of the terminal window. If you want to "Kill" or shut down the terminal completely in VsCode, click the trash can icon instead.
The GIF below shows both ways of opening the terminal. Go ahead and practice opening and closing the terminal using both ways.
4.2) Install Xcode Tools
In order to install various Python packages we will use later in the course like Numpy, Scipy, Matplotlib, and Jupyter Notebook you will first need to install the Mac OSX command line developer tools.
Do this by opening a terminal and copying and pasting the following command (without the dollar sign $) in the terminal:
$ sudo xcode-select --install
Then run the command by hitting enter.
If the terminal prompts you for a password, type your computer login password and hit enter (note that for security reasons, the terminal will not show the characters as they are being typed.)
If you are greeted with a window, you should click the "Install" button (you will not need to click "Get Xcode").
Note that this is quite a large file to download and install, so don't be surprised if this step takes a while.
4.3) Install Packages
Next, install the extra Python packages by entering the following command in the terminal:
$ python3.13 -m pip install geopandas gurobipy jupyter matplotlib networkx nltk numpy pandas pmdarima requests scikit-learn scipy seaborn statsmodels torch
This may take a while, so be patient. While you're waiting, you can read a little about how we just installed these packages in the section below--the process will be useful if you'd like to install other packages in the future.
Once the installation has finished you should be able run test_install.py and see
something like the following output after a while:
hope@hopes-mac-4 example % /usr/local/bin/python3 /Users/hope/Desktop/example/test_python/test_install.py
Begin importing external packages ...
All packages were installed correctly!
If you are having trouble installing something, feel free to ask.
4.4) What is pip?
The easiest, most cross-platform way to install a package like scipy or numpy is using pip, a Python package manager. Most Python installs should come with pip already, so you will likely have it, but if not, here is the documentation on pip installation.
Once you have pip installed, the next step is to open up some sort of shell. On a Mac, this would be Terminal, on Windows, this is usually Windows Powershell, and on Linux, it varies based on your setup and distribution.
Once you have a terminal open, type pip install package_name (replacing package_name with scipy, numpy, or the name of your package). Once that's completed successfully, you can check to make sure the installation worked by opening up any python shell (for example, by typing python3 into the same terminal you used for the earlier step), and then trying import package_name. If there is no error output, it should be correctly installed!
For example, the GIF below shows how a user failed to import a package called statsmodels in the Python shell, installed it in the terminal, and then successfully
imported it in the Python shell afterwards.
5) Introduction to Jupyter Notebook
A Jupyter1 notebook is a type of document that can contain both code and rich text elements (such as images, equations, and other formatted text). We will be using Jupyter notebooks throughout the course in class and at least one assignment. Python notebooks such as Jupyter Notebook or a similar tool called Google Colab are often used in other courses and throughout research and industry for performing data analysis.
The content of a Jupyter notebook is written inside of cells, which are shown as dark blue boxes with text in the picture below. Each cell can contain content of a particular type. For our purposes, there are two types of cells: code (shown in the top box), or Markdown (shown in the bottom box).
Markdown is a plain text formatting syntax. In other words, it's a set of rules about how to make text be displayed a certain way. If you've ever written _underscores_ around a word to italicize it, or **asterisks** around a word to make it bold, you've used Markdown! Here's a useful cheat sheet for the Markdown syntax.
In the next sections we're going to create a new Jupyter Notebook, and show you how to use some basic functionality of Jupyter notebooks. There is extensive documentation available here if you'd like to explore further. If you have any questions along the way, please ask!
5.1) Running Jupyter in VsCode
If you are using VsCode as your IDE, you can edit and run Jupyter notebooks directly within VsCode. If you are using another IDE, skip to this section.
5.1.1) Creating New Jupyter Notebooks in VsCode
To create a Jupyter notebook in VsCode:
- In VsCode create a new file and call it
new.ipynb(the.ipynbextension indicates the file is a Python Jupyter notebook). - Click
+ Codeto create a code cell. Type some code likeprint("hi")inside the cell. - Click the run button to the left of the code cell to execute the code inside of the cell.
- Select your Python interpreter (the version of Python that we just installed.)
- Click
+ Markdownto create a Markdown cell. Type some text like**markdown**inside the cell. - Click the checkmark in the top right of the cell to make rendered text appear.
- Experiment with creating and running more cells. When you are done close the new file by hitting the x button (remember to save the file!).
If you get stuck, you can look at the GIF below, refer to the VsCode Jupyter Notebook tutorial, or ask for help.
5.2) Running Jupyter from the Terminal
If you don't want to use VsCode, or if you also want to learn how to run Jupyter locally in your browser, follow these instructions. Otherwise you can skip to this section.
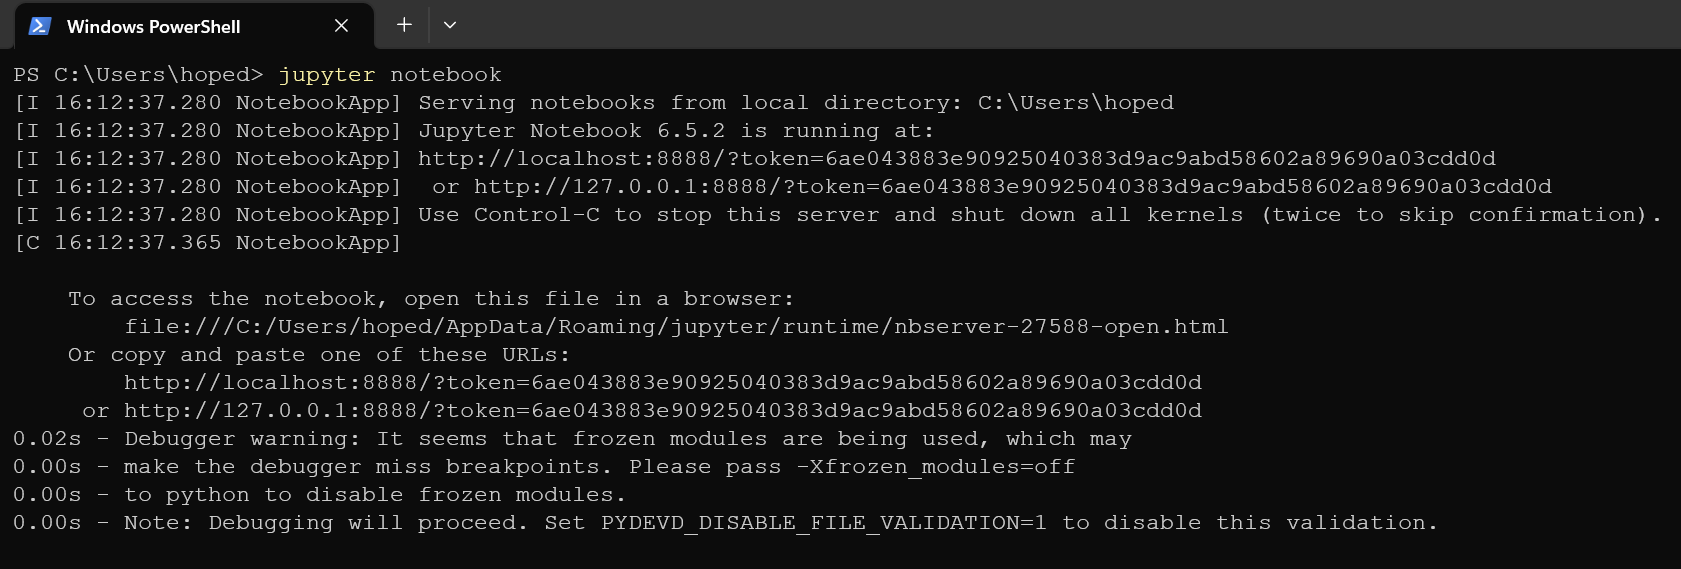
Open a terminal and run the command jupyter notebook (you may need to run python3.13 -m jupyter notebook). In
addition to the output below in the Terminal, this should also automatically
open a page in your web browser. (Note that the page is not relying on an internet connection, perhaps unlike most pages you view with your browser. Rather, as is the case for all URLs beginning with localhost, the page is getting its content from your own "local" machine.)
The web page will look like the dashboard below. Open it now and follow along!
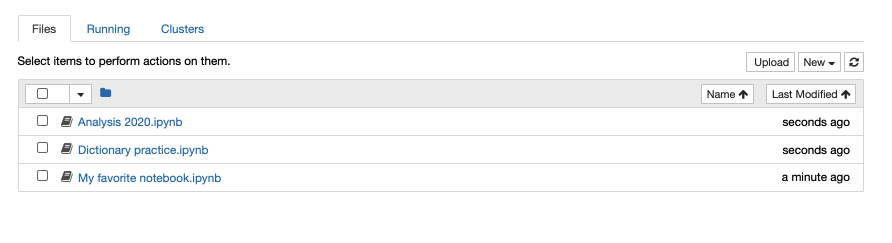
Notice the categories at the top: "Files," "Running," and "Clusters." You will likely live almost exclusively in the "Files" category, which lists all files and folders in the directory in which you ran jupyter notebook. (There may be non-Jupyter-Notebook files listed here, too.)
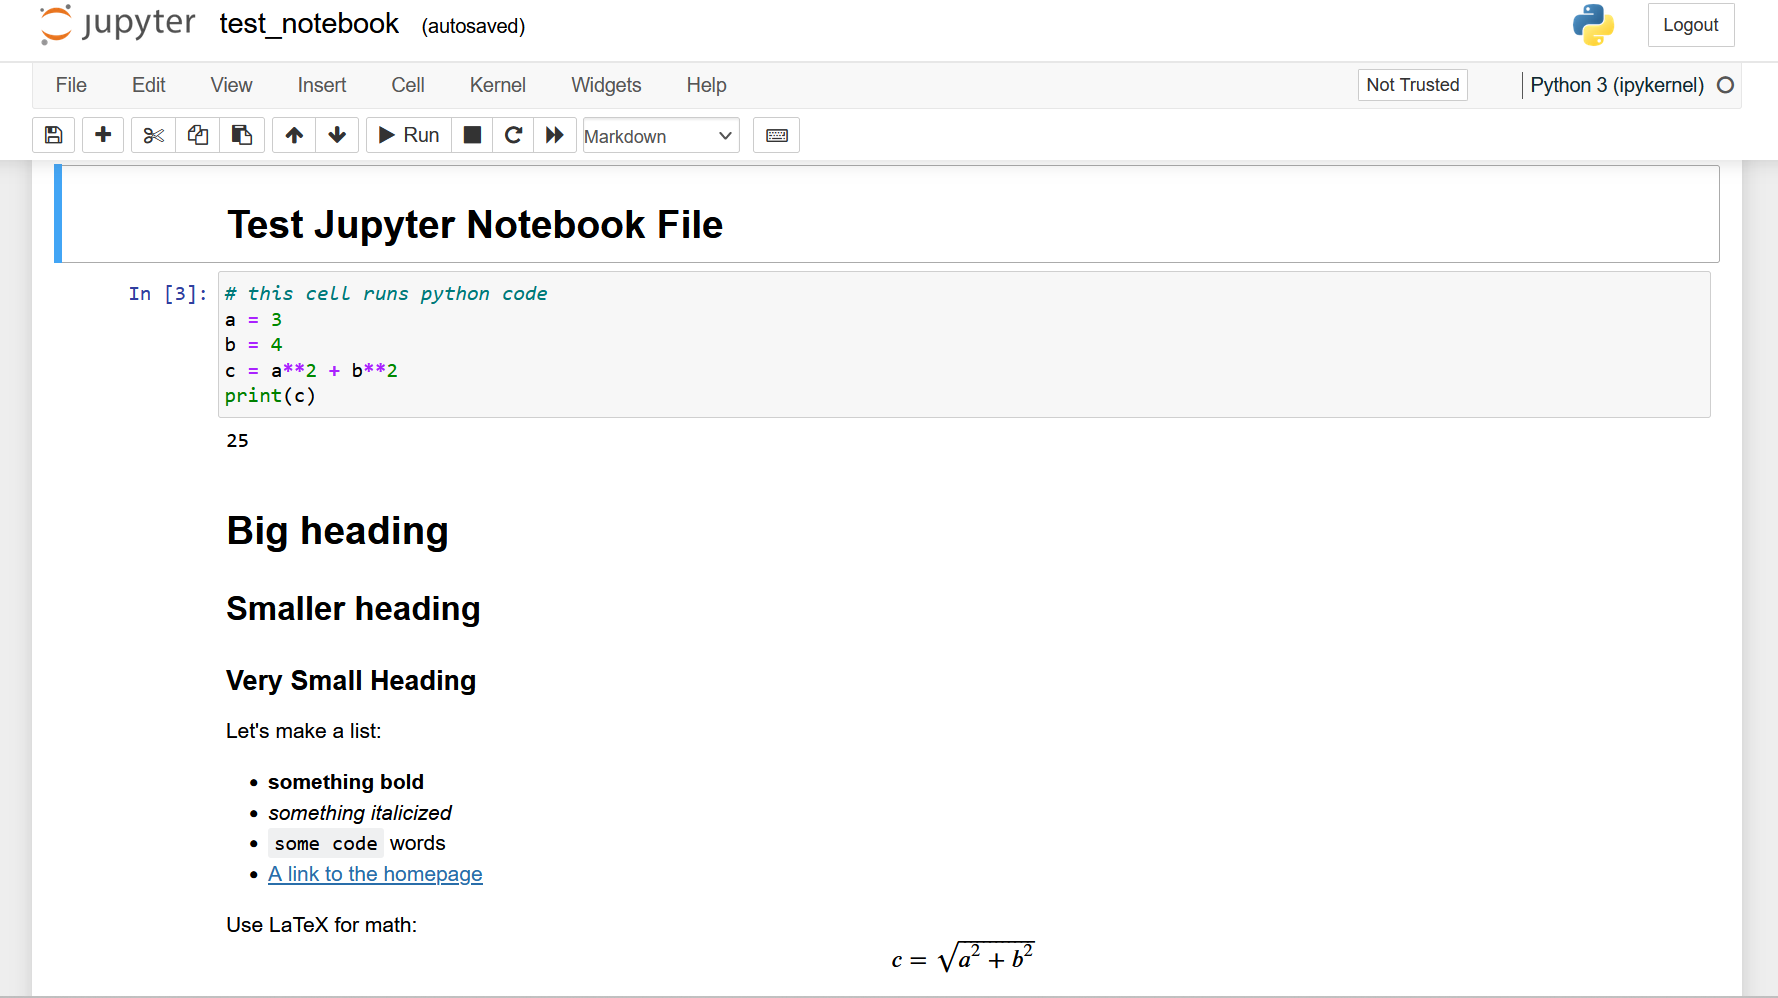
On the Files dashboard, navigate to and open the test_python folder and click on the test_notebook.ipynb notebook to open it, view it, and edit it. Once you open the test_notebook, you should see the following web page appear:
5.2.1) Creating New Jupyter Notebooks in the web interface
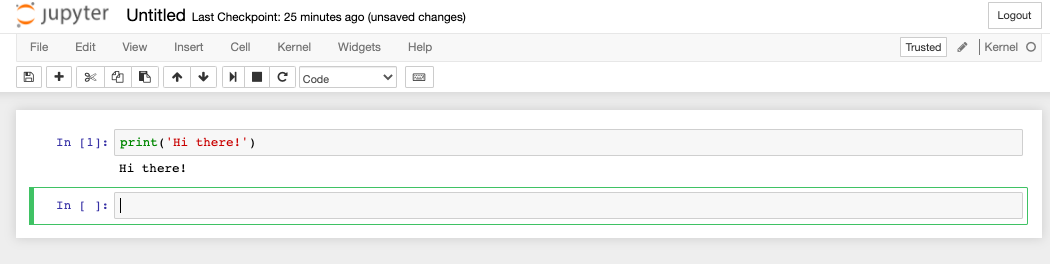
From the Files dashboard, you can also make a new file. Click the "New" dropdown in the top right. Choose to create a new Python notebook. It will open a blank notebook in a new tab:

You can click on "Untitled" at the top to change the name of the file.
Look at your new Jupyter notebook, which contains a single cell. The first cell is by default a code cell. Try typing in a Python expression there. Then, click the "Run" button (this one: ![]() ) to execute its contents. You should see the Python result:
) to execute its contents. You should see the Python result:
After running the cell, Jupyter automatically gave us a new cell. We could have added a new cell ourselves using the "Add" (![]() ) button. And we can delete cells with the "Remove" (
) button. And we can delete cells with the "Remove" (![]() ) button.
) button.
Let's make this new cell a Markdown cell. In the top menu bar, find the Dropdown that says "Code," and switch it to "Markdown."
Type some things into your Markdown cell. When you run the cell, you'll see the results of the formatting on your text.
Note: To quit Jupyter in the terminal close all the browser tabs and press and hold both "Ctrl" and "C" at the same time in the Terminal/Command Prompt in which you launched it.
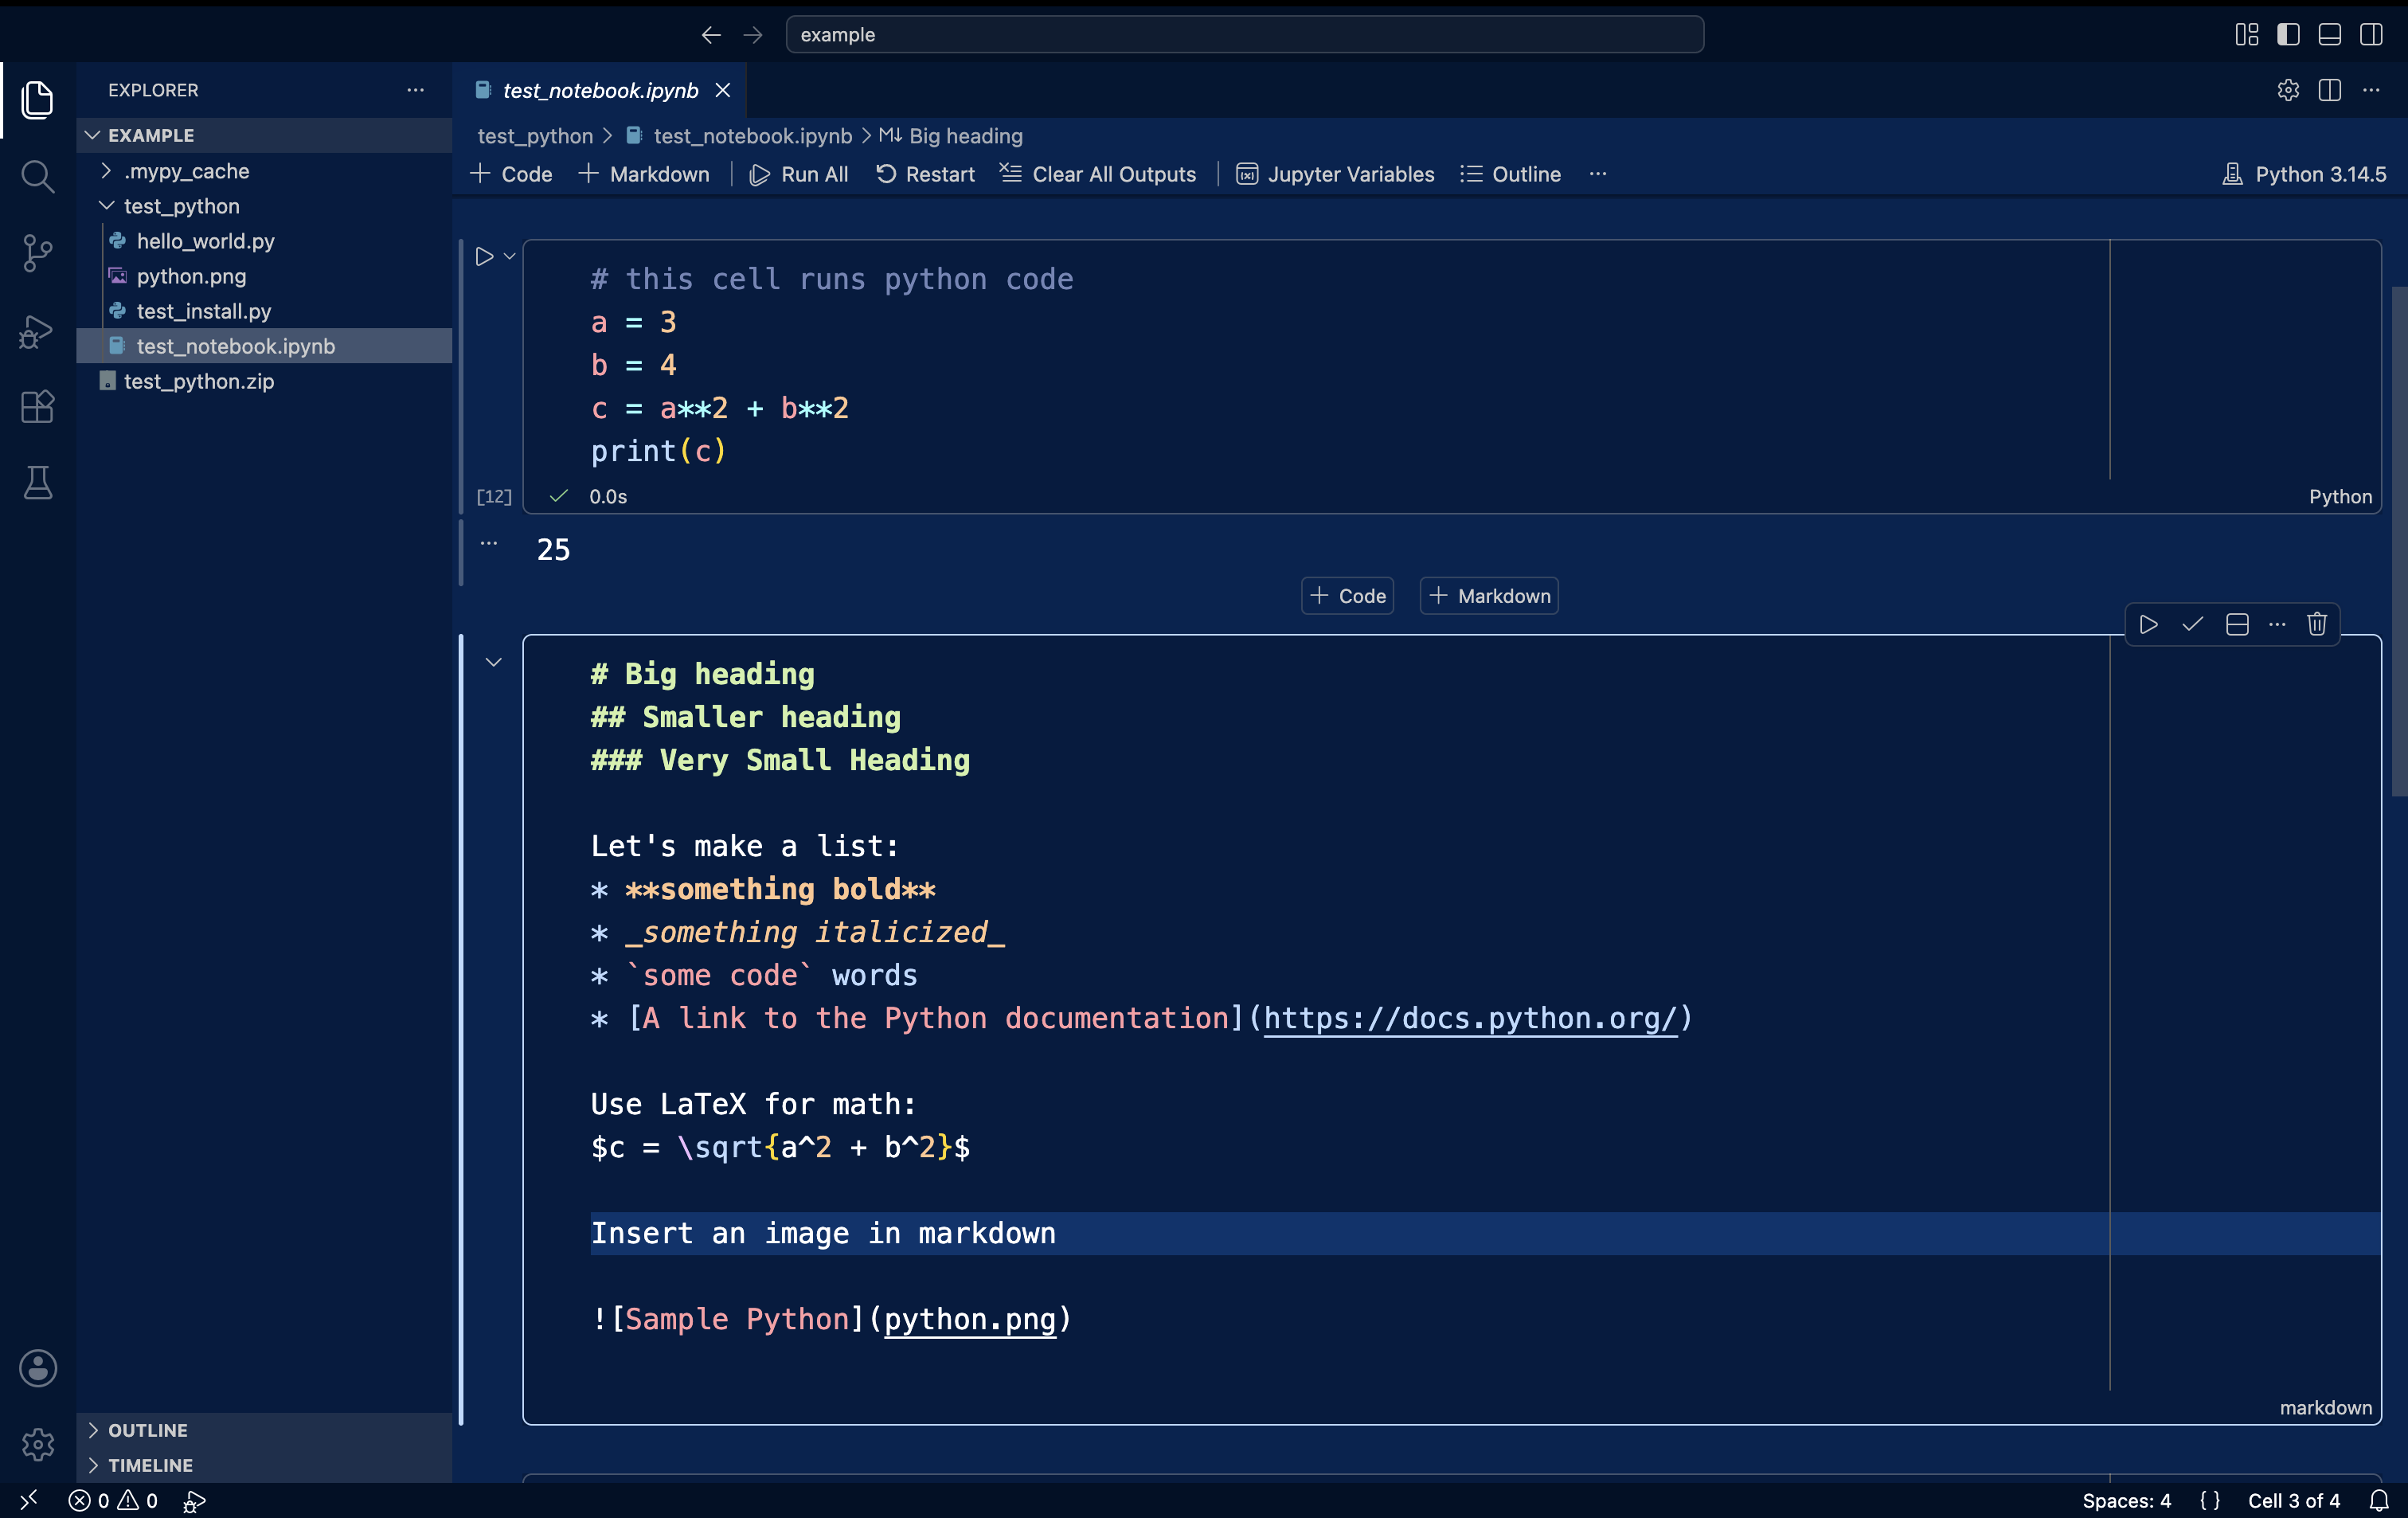
5.3) Example Jupyter Notebook
To see more examples of what you can put in code and markdown cells, open the test_notebook.ipynb Jupyter notebook.
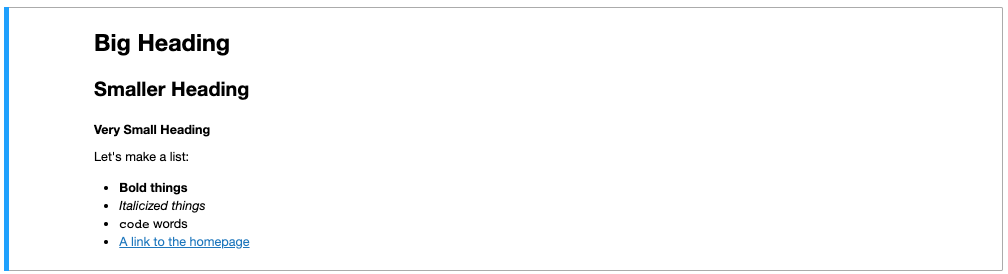
For example this markdown cell:

becomes this after running:
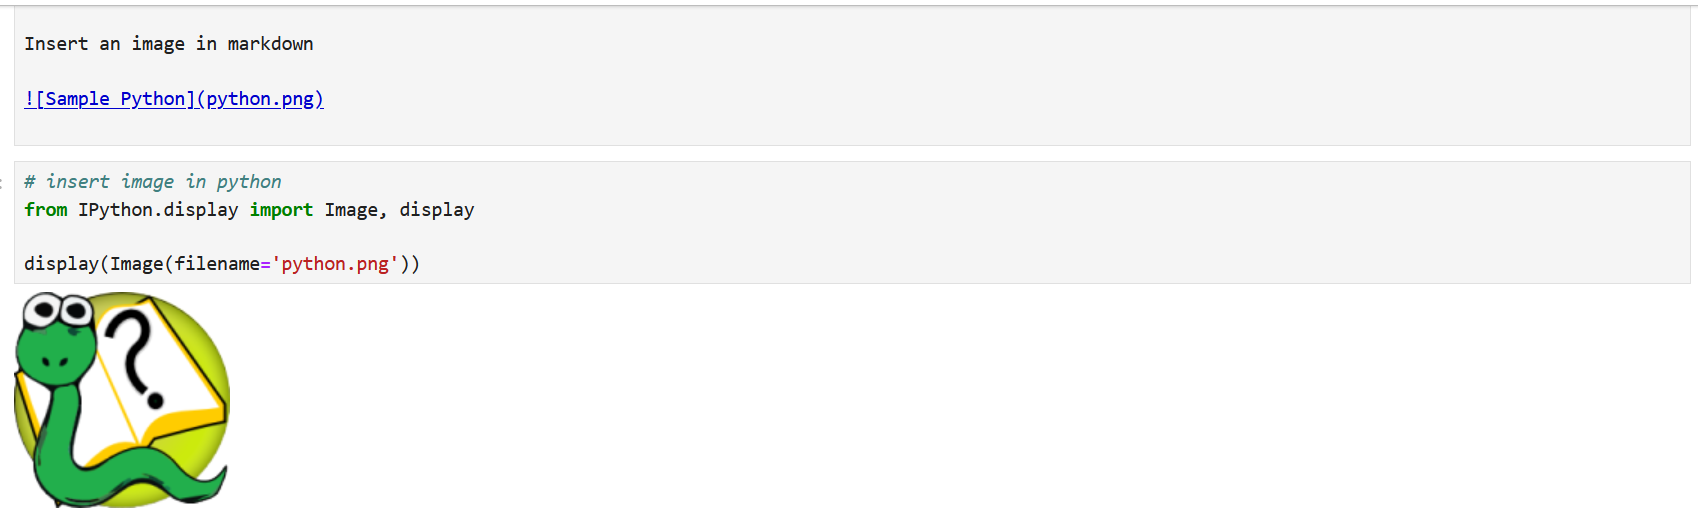
Markdown also supports inclusion of images. In order to include the Python picture in our first example, we moved the python.png file to the same folder as our Jupyter notebook, and included a Markdown cell with the following contents.
5.4) Other Jupyter Tips
The above should be all you need to know to about Jupyter notebooks for now. Here are some other miscellaneous notes which you may find useful:
- You can share variables and imports across cells. This makes it easy to separate your code into chunks, without having to reinitialize variables or reimport modules. We'll learn more about variables in the next unit.
- The keyboard shortcut for running a single cell while you have it selected is "Shift+Enter"
- To run all the cells, you can choose "Run All" from the "Cell" dropdown menu.
- As noted, you can generally stay almost exclusively in the "Files" category of your dashboard. If, however, you find that code in your notebooks takes quite long to run, you may wish to "Shutdown" some of the running notebooks in the "Running" category.